
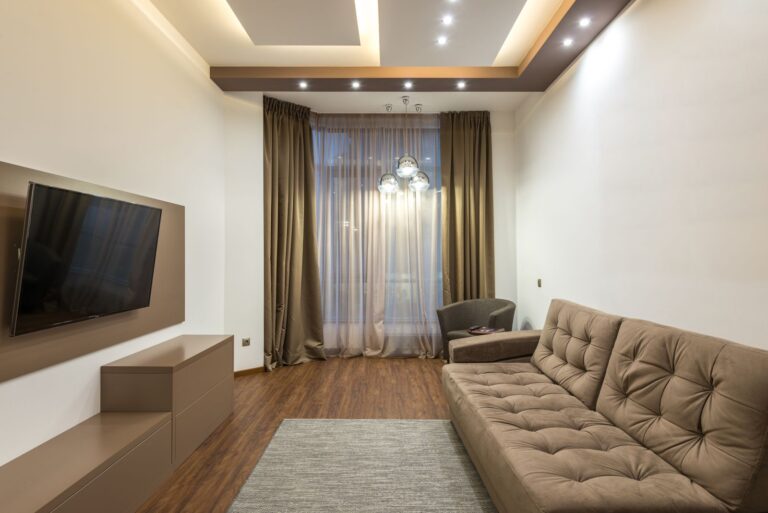
Pot lights can make a Port Coquitlam home feel brighter, taller and more modern — or they can leave it with dark corners, glare and a ceiling that looks like a runway. The difference is almost never the fixture. It is the layout: where each light sits, how far apart they are, and what beam they throw. This guide explains how a good pot light layout is planned for the split levels, ranchers and basement suites common across Port Coquitlam, from Mary Hill and Citadel Heights to Oxford Heights and Birchland Manor, and where BC code and permit rules shape the decisions.
The Spacing Rule: Ceiling Height Divided by Two
The starting point for any pot light layout is the rule of thumb used by lighting designers and reflected in Illuminating Engineering Society guidance: space fixtures about half the ceiling height apart. For general ambient lighting, the maximum spacing between fixtures is roughly the ceiling height divided by two, and the first row of fixtures sits about half that spacing from the wall.
In practice, that gives a simple table for the ceiling heights found in Port Coquitlam homes:
| Ceiling height | Fixture spacing | Distance from the wall |
|---|---|---|
| 7 ft (low basement ceiling) | about 3.5 ft apart | about 1.75 ft from the wall |
| 8 ft (standard main floor) | about 4 ft apart | about 2 ft from the wall |
| 9 ft (newer builds, raised main floors) | about 4.5 ft apart | about 2.25 ft from the wall |
| 10 ft (vaulted or tall entry) | about 5 ft apart | about 2.5 ft from the wall |
Two things about this rule matter. First, it is a maximum spacing for even general lighting, not a target you must hit exactly. Spacing fixtures a little closer gives a smoother result, especially with narrow-beam fixtures. Second, the rule assumes a medium beam angle of roughly 40 to 60 degrees. A narrow beam of 25 to 35 degrees throws a tighter pool of light, so fixtures need to sit closer together; a wide beam of 60 degrees or more spreads further and can sit a little wider apart. Fixture manufacturers publish a spacing criterion for each product — sometimes called the spacing-to-mounting-height ratio — and that figure should override the rule of thumb when it is available.
Choosing Fixture Size and Beam Angle
Fixture size and beam angle should be chosen for the job the light is doing, not for what looks tidy on a plan.
Four-inch fixtures are the usual choice for general lighting in an 8-foot ceiling. They are small enough to disappear into the ceiling and, with a medium beam, throw a pool of light that overlaps well at 4-foot spacing. Six-inch fixtures suit higher ceilings and larger rooms, where a wider beam and higher output cover more area from each position. Three-inch fixtures are best for accent work — washing a feature wall, highlighting art or lighting a display niche — because their narrow beam is designed to draw the eye, not to light a whole room.
Beam angle is the choice most layouts get wrong. Narrow beams of 15 to 30 degrees are for accent lighting only. Used for general lighting, they create the classic “runway” effect: a line of bright spots with dark gaps. Medium beams of 40 to 60 degrees are the workhorse for kitchens, living rooms and bedrooms. Wide beams of 60 degrees and up suit high ceilings and open-plan spaces, where the light has further to travel and more floor to cover.
Room-by-Room Layouts for Port Coquitlam Homes
Kitchens
Kitchens are task rooms, and the layout should be planned around the counters, not the centre of the room. A common approach is a row of fixtures about 3 to 4 feet apart, positioned roughly 12 to 18 inches out from the face of the upper cabinets, so the light lands on the work surface instead of on the cook’s shoulders. A second row over an island or peninsula lights the seating and preparation area, and under-cabinet lighting fills the shadow the upper cabinets cast on the counter. In Port Coquitlam split levels, where the kitchen often sits on the main floor above a finished basement, access from below is limited, so the layout should be settled before any ceiling is opened.
Living Rooms
Living rooms need flexibility more than brightness. A grid based on the ceiling-height rule, on a dimmer, gives even ambient light that can be turned down in the evening. Keep fixtures away from the seating positions so nobody sits directly under a downlight — a fixture centred over a sofa throws harsh light on the people sitting there and glare into the television. If the room has a feature wall, a fireplace or built-in shelving, a row of narrow-beam accent fixtures set 2 to 3 feet from the wall will wash the surface without competing with the general lighting.
Bathrooms
Bathrooms need brighter, more even light than most rooms, and they have an extra rule: any fixture installed over a shower or bath must be rated for wet locations, and the circuit needs the ground-fault protection the Canadian Electrical Code requires in wet areas. A fixture centred over the vanity casts shadows on the face; better practice is a pair of fixtures flanking the mirror, or a row set forward of the mirror line, with a separate fixture over the shower.
Hallways and Stairs
Hallways are where bad spacing is most visible, because there is nowhere to hide a dark gap. A single line of fixtures down the centre of the hallway, spaced to the ceiling-height rule, gives an even wash. On stairs, fixtures should be spaced along the run of the stair rather than clustered at the top and bottom, and the switch should be reachable from both levels.
Bedrooms and Basement Suites
Bedrooms need less light than kitchens, and the layout should keep fixtures away from the bed itself. A perimeter layout, with fixtures set in from the walls and dimmed, is usually enough. Basement suites — common in Port Coquitlam ranchers and split levels — have lower ceilings, often 7 feet, so fixtures sit closer together, about 3.5 feet apart, and canless LED fixtures are often the practical choice because they fit in the shallow joist space. In a suite, check the ceiling assembly before choosing fixtures: a fire-rated separation between the suite and the floor above can restrict the type of recessed fixture that may be installed.
What Port Coquitlam Homes Add to the Layout
Port Coquitlam’s housing stock shapes pot light work in specific ways. Many homes in Mary Hill, Citadel Heights and Oxford Heights are split levels and ranchers from the 1970s and 1980s. Their main floors often have accessible attics, which makes running new wiring straightforward, but their original wiring and panels may be near capacity, so the circuit should be checked before new fixtures are added. Some of these homes still have original aluminum branch wiring, which needs special devices and connection techniques whenever new fixtures are tied in.
Newer homes on the hillsides and in newer subdivisions tend to have taller ceilings, vaulted entries and open plans. Those call for wider spacing, larger fixtures and careful dimmer planning, because a tall ceiling amplifies both glare and dark spots. Townhouses and condos add a further consideration: concrete ceilings in many multi-unit buildings mean recessed housings are not an option at all, and slim surface-mount fixtures or a dropped bulkhead are used instead, with strata approval where the work touches common property.
Permits, Code and Inspection in Port Coquitlam
Adding new pot lights, running new wiring, adding switches or circuits, and most commercial lighting work require an electrical permit in British Columbia and should be done by a licensed electrical contractor. In Port Coquitlam, electrical permits are issued by Technical Safety BC, which also carries out the inspection. Vancouver, Burnaby, Surrey and several other municipalities issue their own electrical permits; Port Coquitlam, Coquitlam, Port Moody, New Westminster and Pitt Meadows fall under Technical Safety BC.
A permit matters for more than the inspection itself. The installation goes on record, which matters for insurance and when the home is sold. It also means the work is checked against the Canadian Electrical Code as adopted in BC — including the recessed-luminaire rules in Section 30, the requirements for ground-fault protection in wet locations, and the rules for fixtures in insulated ceilings.
Insulation is the code point that catches most DIY pot light jobs. In a top-floor ceiling below an attic, only fixtures rated for contact with insulation should be used. The Canadian Electrical Code, Section 30, defines recessed luminaires by type: Type IC fixtures are designed for installation in a cavity filled with thermal insulation and may be in direct contact with it, while Type Non-IC fixtures must be kept clear of insulation — at least 76 mm of clearance from thermal insulation. Using a Non-IC fixture buried in attic insulation is a fire risk and will fail inspection. Canless LED fixtures are commonly IC-rated, but the rating should always be confirmed on the fixture’s own label, not assumed. A licensed contractor takes out the permit under their own licence, so the homeowner does not need to navigate the application.
Common Layout Mistakes to Avoid
The mistakes that spoil a pot light layout are predictable, and most of them are made before a single hole is cut. Spacing fixtures by eye instead of by the ceiling-height rule leaves dark gaps. Using narrow-beam accent fixtures for general lighting creates bright spots with shadows between them. Placing a fixture directly over a sofa, a bed or a television creates glare where people sit and look. Forgetting the dimmer, or fitting a dimmer that is not compatible with the LED fixtures, leaves the room either too bright or flickering. And choosing fixtures without checking the insulation rating — or the ceiling assembly in a basement suite — creates a problem that only shows up at inspection, when the ceiling is already closed.
When to Call a Licensed Electrician
A homeowner can plan a layout, choose fixtures and decide on colour temperature. The electrical work itself — new circuits, wiring in finished ceilings, work in insulated cavities, connections to the panel and anything requiring a permit — belongs to a licensed electrical contractor. That is especially true in older Port Coquitlam homes, where the panel may be full, the wiring may be aluminum, or the circuit the new lights would join may already be carrying more load than it should. An electrician checks the circuit and the panel first, takes out the permit, and makes sure the finished installation passes inspection.
For a full overview of the lighting work Intel Power carries out across the Tri-Cities, see our lighting electrical services page.
If the project is in Port Coquitlam, our electrician in Port Coquitlam page explains how we plan a site visit, what we check before quoting, and which neighbourhoods we serve.
Frequently Asked Questions
How far apart should pot lights be in a Port Coquitlam home?
As a starting point, space pot lights about half the ceiling height apart — 4 feet apart in a standard 8-foot ceiling, 4.5 feet in a 9-foot ceiling, and 3.5 feet in a 7-foot basement ceiling — with the first row about half that distance from the wall. Narrow-beam fixtures need closer spacing, and the fixture manufacturer’s own spacing figure should override the rule of thumb.
Do I need a permit to install pot lights in Port Coquitlam?
Yes, in most cases. Adding new pot lights, running new wiring or adding a circuit requires an electrical permit, and in Port Coquitlam permits are issued by Technical Safety BC. A licensed electrical contractor takes out the permit under their own licence and arranges the inspection.
What is an IC-rated pot light, and why does it matter?
An IC-rated (insulation contact) recessed fixture is designed to sit in direct contact with thermal insulation, which is the normal situation in a top-floor ceiling below an attic. A Non-IC fixture must be kept clear of insulation — the Canadian Electrical Code requires at least 76 mm of clearance — and burying one in insulation is a fire risk and will fail inspection.
Why do my pot lights flicker or buzz on a dimmer?
The usual cause is a dimmer that is not compatible with the LED fixtures, or an older dimmer designed for incandescent lamps. LED fixtures need a dimmer matched to their driver. If flickering continues after a bulb change, the dimmer, the fixture or the connection should be checked by an electrician rather than left running.
Can pot lights be installed in a finished ceiling with no attic access?
Yes, but the work is different. Canless LED fixtures are shallow enough to fit between joists, and the wiring is fished through the ceiling cavity, which means more cut-outs and patching than a job with attic access. The layout should be settled before any holes are cut, because moving a fixture after the ceiling is patched means opening it again.