The adoption of electric vehicles (EVs) is accelerating worldwide, fueled by environmental awareness, government incentives, and advancements in battery technology. As more households embrace EVs, installing a home EV charger has become a crucial step in making the most of your vehicle’s capabilities. A dedicated home charger ensures convenience, faster charging times, and optimal energy use. This complete guide will explore everything you need to know about EV charger installation at home, from choosing the right charger to step-by-step installation, benefits, common mistakes, and expert tips.
Why Home EV Charger Installation Is Important
Relying solely on public charging stations can be inconvenient, especially during peak times or long commutes. Home EV chargers provide:
- Convenience: Charge your EV overnight without visiting public stations.
- Cost Efficiency: Charging at home is generally cheaper, especially when using off-peak electricity rates.
- Energy Control: You can integrate home chargers with solar panels or renewable energy systems for greener charging.
- Time Savings: Avoid waiting in queues at public chargers and start each day with a fully charged EV.
Types of Home EV Chargers
Understanding the different types of EV chargers is essential before installation. The primary categories include Level 1, Level 2, and DC fast chargers:
Level 1 Chargers
Level 1 chargers connect to a standard 120V household outlet. They are the simplest and most affordable option but provide slow charging speeds, typically 3–5 miles of range per hour. Level 1 chargers are suitable for drivers with low daily mileage or occasional EV use.
Level 2 Chargers
Level 2 chargers operate on a 240V circuit, offering faster charging rates—approximately 20–60 miles of range per hour. They are ideal for daily EV use and long-distance commuters. Many Level 2 chargers feature smart functions like app control, scheduling, and energy monitoring.
DC Fast Chargers
DC fast chargers are primarily used in commercial settings due to high costs and electrical requirements. However, some high-end residential setups may incorporate them. These chargers can rapidly charge an EV to 80% in less than an hour but require significant electrical infrastructure.
Factors to Consider Before Installing an EV Charger
Before starting the installation, consider several factors to ensure safety, efficiency, and cost-effectiveness:
- Electrical Panel Capacity: Check if your home’s electrical panel can handle the additional load. Most Level 2 chargers require a 30–50 amp dedicated circuit.
- Charger Compatibility: Ensure the charger is compatible with your EV’s charging port and supports the desired charging speed.
- Location: Choose a convenient and accessible location for your charger near the parking area.
- Permits and Codes: Local regulations may require permits for electrical upgrades. Ensure compliance with safety codes.
- Budget: Factor in equipment, installation, and any potential electrical upgrades.
Step-by-Step Guide to EV Charger Installation at Home
Installing a home EV charger involves careful planning and execution. Below is a detailed guide:
1. Assess Your Home Electrical System
Hire a licensed electrician to evaluate your existing electrical panel and determine whether an upgrade is necessary. This ensures the new circuit can safely support the charger’s load.
2. Select the Right Charger
Consider charging speed, cable length, smart features, and warranty. Popular brands offer a variety of residential chargers with different power ratings and functionalities.
3. Obtain Necessary Permits
Contact your local building authority to confirm whether permits are required. Submitting accurate electrical plans ensures compliance and avoids fines.
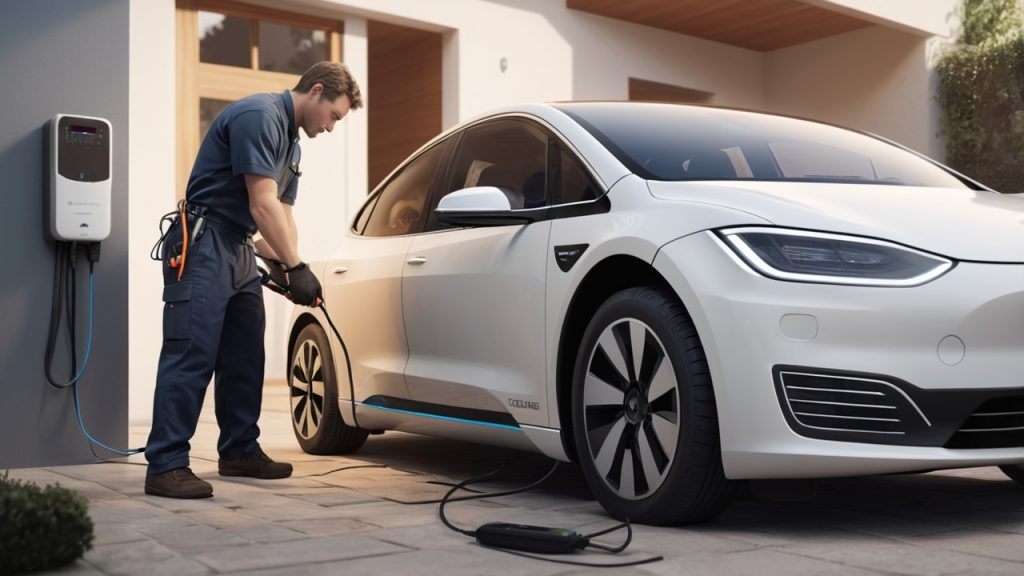
4. Hire a Licensed Electrician
Even if a charger is advertised as DIY-friendly, professional installation ensures safety, code compliance, and reliability. The electrician will install a dedicated circuit, mount the charger, and perform testing.
5. Charger Installation and Wiring
The electrician mounts the charger near the parking area and connects it to the newly installed circuit. Ensure cables are properly managed and protected to avoid tripping hazards or damage.
6. Testing and Verification
After installation, test the charger with your EV. Confirm that charging begins correctly, the charging rate is consistent, and any smart features are functioning.
Benefits of Installing an EV Charger at Home
Home EV charging offers multiple advantages, making it a worthwhile investment:
Time Savings and Convenience
No more waiting at public charging stations. You can charge overnight and start your day with a fully charged EV.
Cost-Effective Charging
Home charging allows you to utilize off-peak electricity rates. Over a year, this can save hundreds of dollars compared to public charging fees.
Enhanced Safety and Reliability
Dedicated home chargers reduce the risk of using damaged public chargers or unreliable outlets. Professional installation ensures safe and consistent operation.
Environmental Impact
Charging at home, especially with renewable energy sources like solar panels, reduces carbon emissions and promotes sustainable living.
Common Mistakes to Avoid
- Installing a charger on an insufficient electrical circuit.
- Neglecting to check compatibility with your EV.
- Ignoring local building codes and permit requirements.
- Poor placement causing limited cable reach or safety hazards.
- Attempting DIY installation without proper electrical knowledge.
Expert Tips for Optimal Home Charging
- Schedule charging during off-peak hours to reduce electricity costs.
- Use a smart charger for remote monitoring and automated scheduling.
- Regularly inspect cables and connectors for wear.
- Ensure the charging area is clean, dry, and free of obstructions.
- Integrate renewable energy sources if possible for sustainable charging.
Real-Life Scenarios
Consider a family in California with two EVs. They installed a Level 2 home charger connected to their solar panel system. Overnight, both vehicles charge efficiently, leveraging off-peak electricity and reducing dependence on public charging stations. Over a year, this setup saved them nearly $800 in public charging costs and significantly lowered their carbon footprint.
Upgrading Your Home Electrical System
Some older homes may require panel upgrades to accommodate a Level 2 charger. Upgrading involves:
- Increasing panel amperage capacity
- Installing a dedicated 240V circuit
- Upgrading wiring to handle higher currents
- Ensuring proper grounding and safety devices
Professional electricians can evaluate costs and suggest the most cost-effective upgrades.
Cost Considerations
Home EV charger installation costs vary based on charger type, electrical upgrades, and labor:
- Level 1 Charger: $300–$600 (minimal installation)
- Level 2 Charger: $500–$1,200 (plus installation $500–$1,500)
- Electrical Panel Upgrade: $1,000–$3,000 depending on complexity
- Permits and Inspections: $100–$500
While initial costs may seem high, long-term convenience, cost savings, and increased property value make it a sound investment.
Integrating Smart Features
Modern chargers offer smart capabilities that enhance the charging experience:
- Remote monitoring via apps
- Automated scheduling during off-peak hours
- Energy usage analytics
- Integration with solar panels or home energy systems
- Firmware updates for enhanced safety and efficiency
Maintenance and Safety Tips
Proper maintenance ensures longevity and safety:
- Inspect cords and plugs for frays or damage
- Keep the charging area free from water and debris
- Ensure ventilation around the charger
- Test the charger periodically for proper operation
- Follow manufacturer recommendations for cleaning and maintenance
Conclusion
Installing an EV charger at home is more than a convenience—it’s a long-term investment in efficiency, cost savings, and sustainability. By understanding the types of chargers, planning installation carefully, avoiding common mistakes, and implementing smart features, homeowners can enjoy seamless EV charging. Always consult licensed electricians and follow local codes to ensure safety and reliability. With the right setup, your home EV charger becomes a cornerstone of your eco-friendly lifestyle.
FAQ
1. Can I install a Level 2 EV charger myself?
It is strongly recommended to hire a licensed electrician for Level 2 installation due to the high voltage and code requirements, even if some chargers claim DIY compatibility.
2. How long does it take to charge an EV at home?
Charging times depend on charger type and battery size. Level 1 may take 12–24 hours, while Level 2 typically charges an EV overnight.
3. Do I need a dedicated circuit for an EV charger?
Yes, most Level 2 chargers require a dedicated 240V circuit rated for 30–50 amps to ensure safe operation.
4. Will installing a home EV charger increase my electricity bill?
Yes, charging an EV consumes electricity, but off-peak rates and efficient charging can minimize costs compared to public charging.
5. Can I use solar power for home EV charging?
Yes, integrating solar panels with your EV charger can reduce grid dependency and provide a greener charging solution.